How to Install Java on Mac OS?
Step-by-step instructions are provided to help you install Java on Mac OS.
Please note: As of September 2021, Java 17 is the most stable version of Java – Java 11 and 8 are currently supported with long-term support (LTS).
James Gosling developed Java at Sun Microsystems as a general-purpose language. Java is an object-oriented, high-level programming language designed to have few implementation dependencies.
Programmers can compile Java code once and run it on any platform supporting Java without recompiling, which makes it easier for them to write code.
Reminder: At the time of writing this article, Java 19 is the latest version, and Java 20 will replace it in March 2023. Java 17 is a stable version, so Oracle will continue to support it. The Premier support period will end in September 2026, and the Extended support period will end in September 2029.
Download Java:
In general, there are two ways to download Java:
- You can download it from Oracle’s website.
- The use of terminal via homebrew.
The following steps will help you download and install Java on Mac from Oracle’s official website using the first method: Download Java
To download Java 17, click on the download option highlighted in the below media, in which you should download the ‘.dmg’ file and proceed with the download.
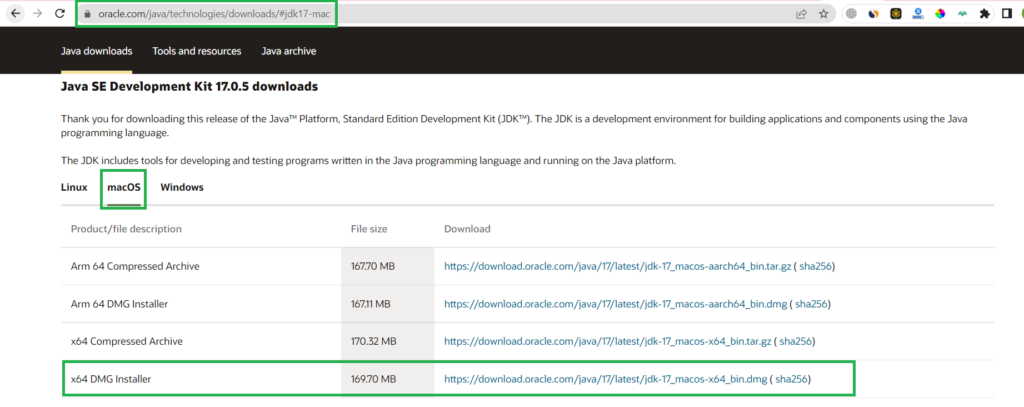
Hint: In macOS, it is suggested to download complete files rather than compressed files due to internal constraints of macOS. You can also download the x64 compressed archive and then extract it to your Mac.
Install Java On Mac
Please visit our separate articles for how to install Java on Windows and Linux. Below are the steps to install Java on Mac with screenshots.
Install Java On Mac – Step 1:
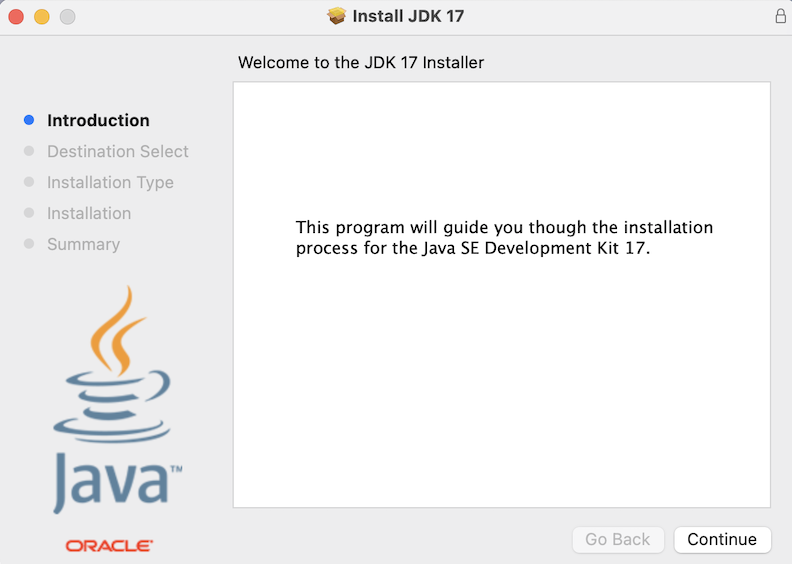
To install Oracle JDK 17 on your Mac, open the DMG file and double click the JDK package you downloaded in the previous step. A DMG disk will be installed and an installer will be presented as shown in Figure. Review Oracle JDK’s updated License Agreement.
Step 2 – Continue:
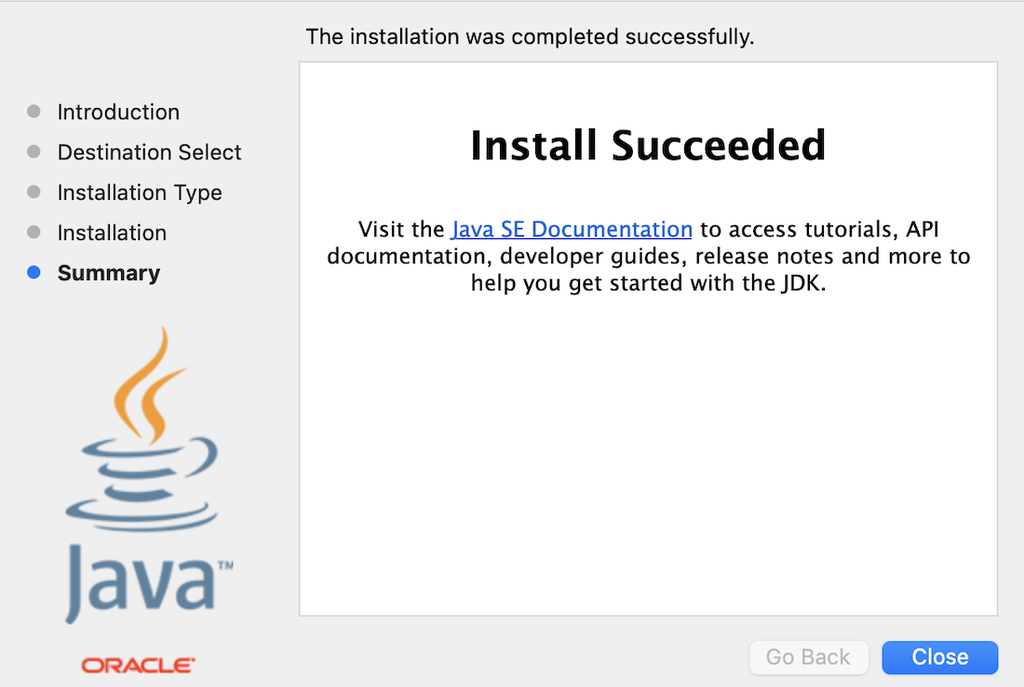
Activate Java 17 by clicking the Continue button -> select the destination -> install -> Enter your password to authorize the installation.
Hint: By clicking the Back button, you can change the installation location. Big Sur didn’t allow me to change the installation location.
Step 3 – Unmount:
Right-click the DMG image to unmount it as shown in below image.
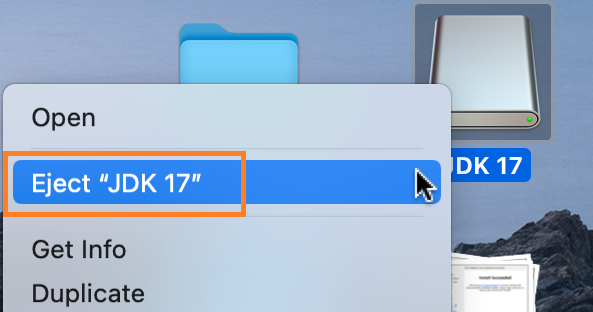
This basically deletes the setup, which is not something we do in Windows.
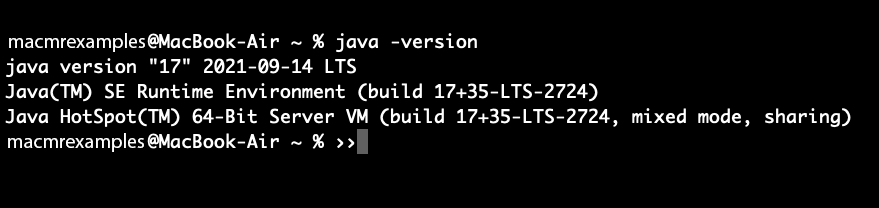
Step 4 – Java Version:
Using the picture below, we can confirm the JDK version has been installed successfully. This concludes the tutorial on How to install Java on mac OS.
java -version
How to set/change the Path of Java on macOS?
Since it is important to understand Java on any platform, we need to be extremely attentive and careful. Here are the steps to follow to change the Java path on Mac:
Step 1:
Open the Terminal and type “which java”. You should see something like /usr/bin/java.
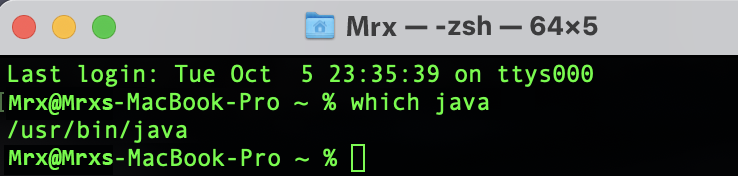
The Java Home directory contains a subdirectory named ‘bin’ that contains Java. On Mac OSX, it is /Library/Java/Home.
Step 2:
Enter the following command into Terminal to set JAVA_HOME. You don’t need to remember it, just stress about it and move forward.
export JAVA_HOME=/Library/Java/Home
Step 3:
Enter the following command to confirm the path
echo $JAVA_HOME

Step 4:
The application should now run
Reminder: This only sets the JAVA_HOME for this session. If you would like it to be permanent, then you’ll need to add the command to your */.zshenv or */.zshrc file because on macOS 10.15 Catalina and later, zsh is the default Terminal shell. Instead, follow:
Step 5:
Enter the following commands into the terminal:
nano ~/.zshenv

Alternatively, you can use any terminal command line text editor.
Step 6:
Put below line at the end of ~/.zshenv file
export JAVA_HOME=$(/usr/libexec/java_home)

Step 7:
Press CTRL+ X buttons, Then Press ‘Y‘, to save and exit nano editor.
Step 8:
Retrieve the file and print $JAVA_HOME.
source ~/.zshenv
echo $JAVA_HOME
Congratulations! We have successfully set your JAVA_HOME environment variable if we see the below command
/Library/Java/JavaVirtualMachines/jdk-17.jdk/Contents/Home
You now know how to install Java on a Mac.
