How to Install MySQL On Mac OS?
MySQL is an open-source database program. Every website or application requires some kind of database.
MySQL database can be implemented and connected to the server – It will provide data from the database for queries.
The operation is identical to that in the SQL query language – Data can be added, accessed, and formatted in MySQL tables.
MySQL Features:
- You can download and install it easily since it is open source.
- Using MySQL database language, you can access data very quickly.
- Databases are easy to implement and use.
- Any operating system can be used with it.
Install MySQL On Mac OS:
- For instructions on how to install MySQL on Linux, click here.
- For Windows users, please see our article about how to install MySQL on Windows.
Follow these steps to install MySQL on Mac OS
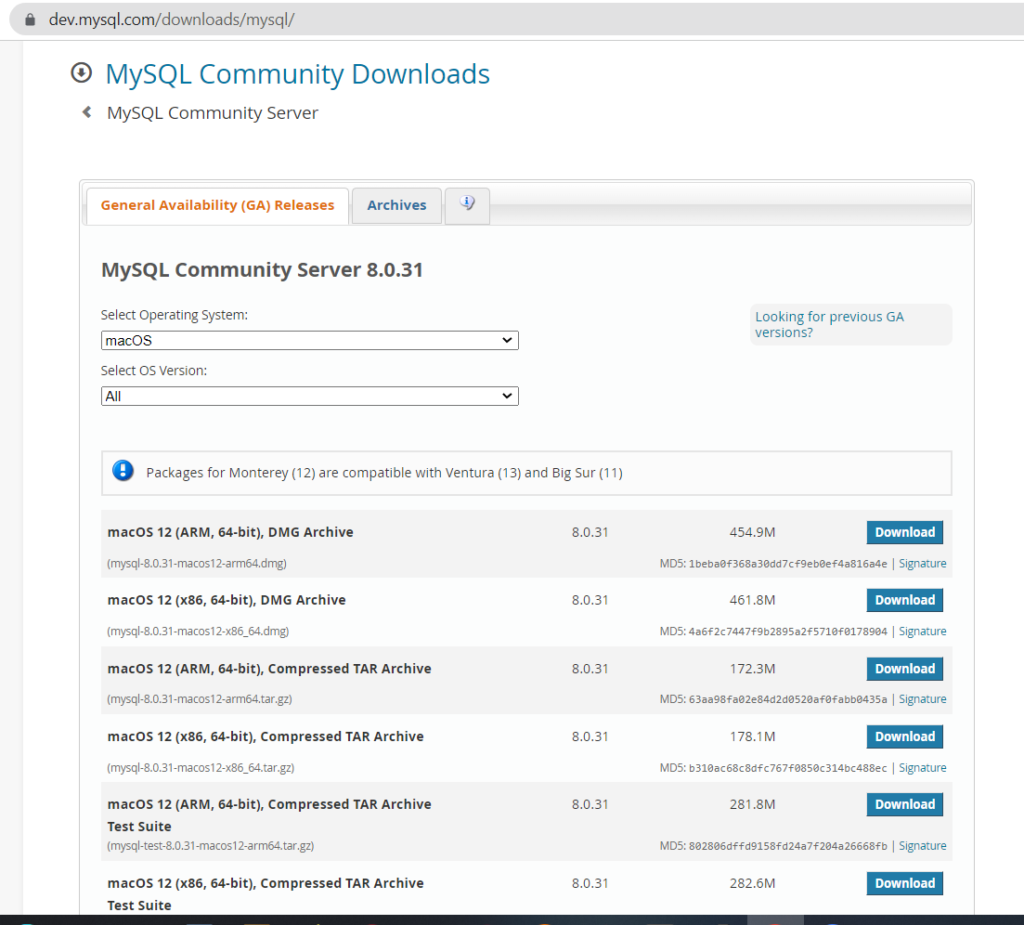
Step 1: Use any browser to access MySQL’s official website and select Mac OS. You can click download there if you are using the latest Mac OS. Alternatively, you can use archives if you are using an older version of Mac OS.
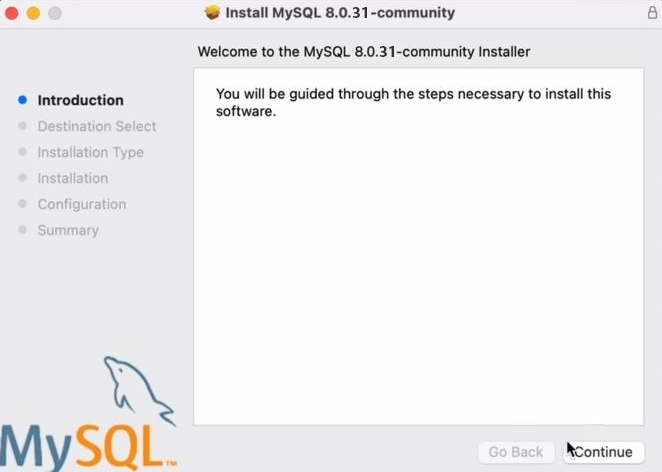
Step 2: Upon downloading the setup file, double-click on it to start the installation process, click on continue to proceed.
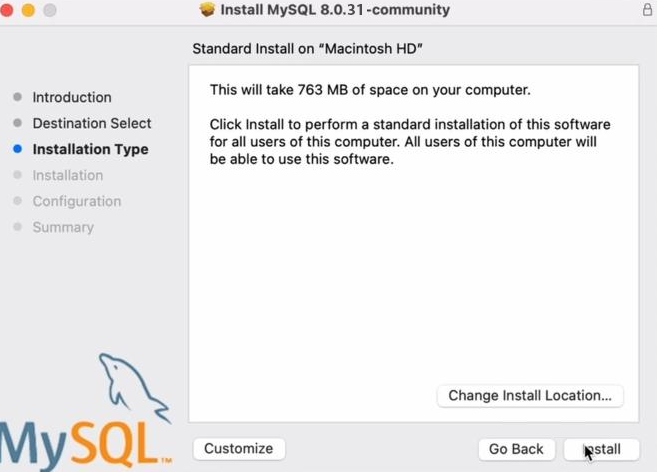
Step 3: To proceed, click on the install button.
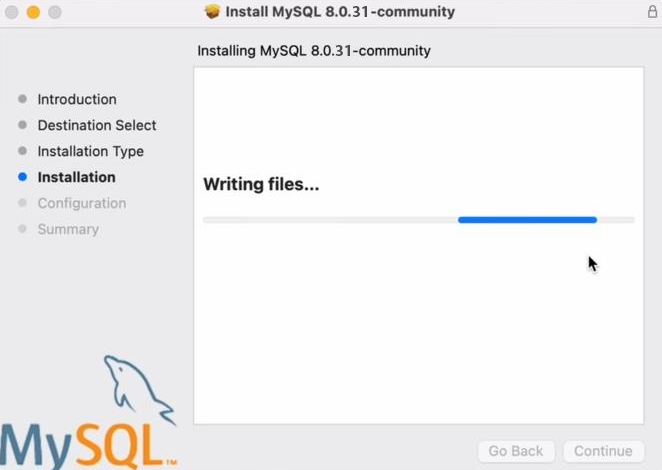
Step 4: Let the installation process finish.
Step 5: For the next step, click the Next button.
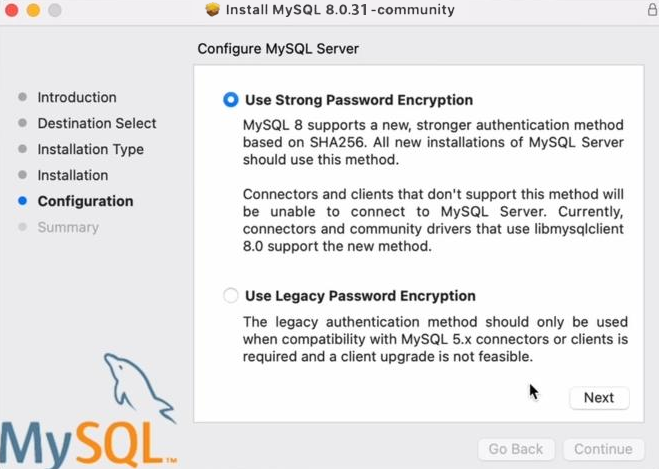
Step 6: Click on Finish after providing some strong passwords and Please wait until the process is completed.

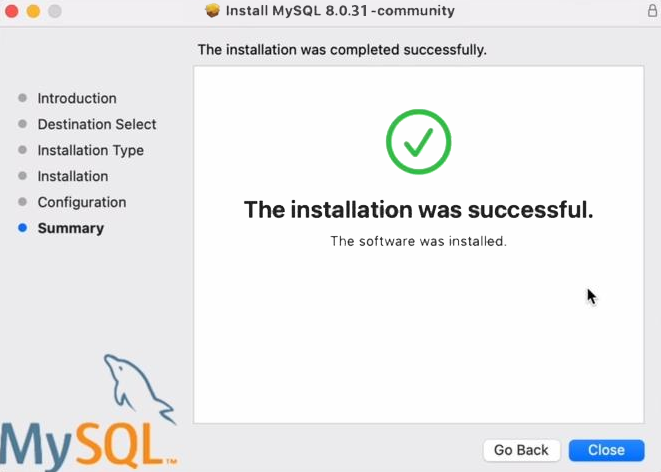
Step 7: Your installation will then be successful.
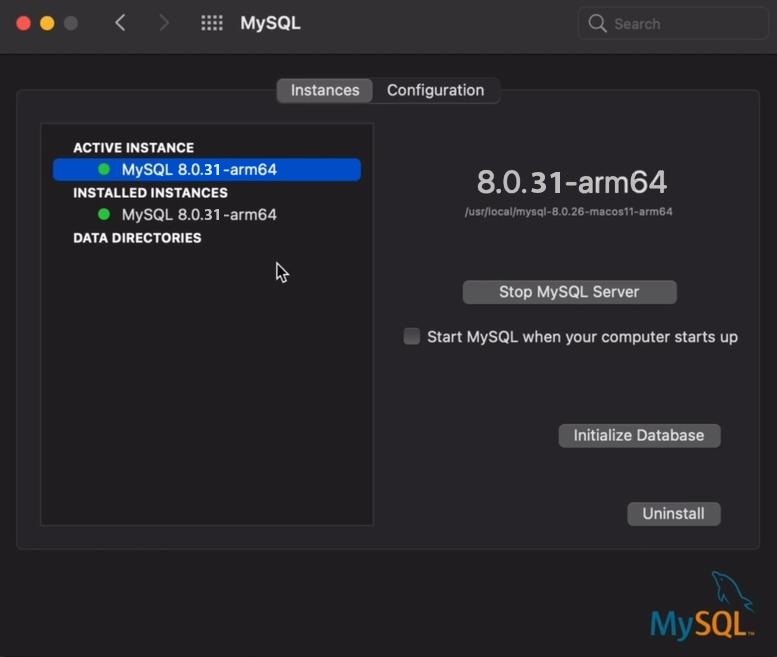
Verify Installation: Last but not least, you will find that MySQL has been installed under system preferences.
How to use MySQL In Mac Terminal?
Now that you know how to install MySQL on Mac, you can read our article about using MySQL with Python or continue reading below Steps for using MySQL with Mac Terminal:
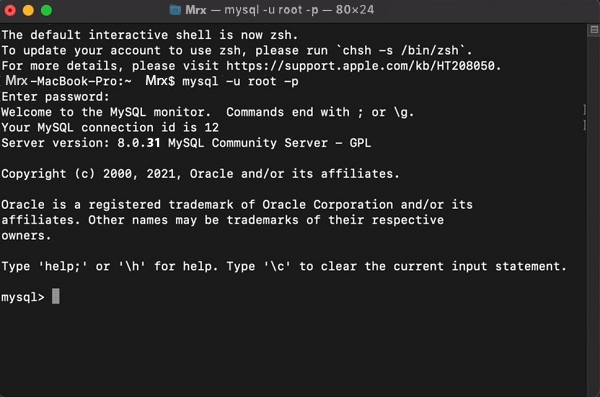
Step 1: To work with MYSQL on Mac OS, you need to open your terminal. Navigate to the folder where the installation was made – Run the following command.
mysql -u root -p
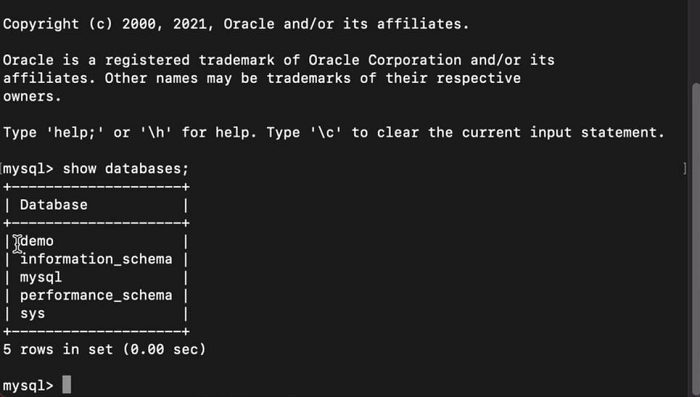
Step 2: MySQL will then begin to work. You will then need to write the following command. MySQL Server will display how many databases it has.
show databases;
Step 3: The next step is to run the following command in order to add a new database. A new database will be created.
create database <database_name>;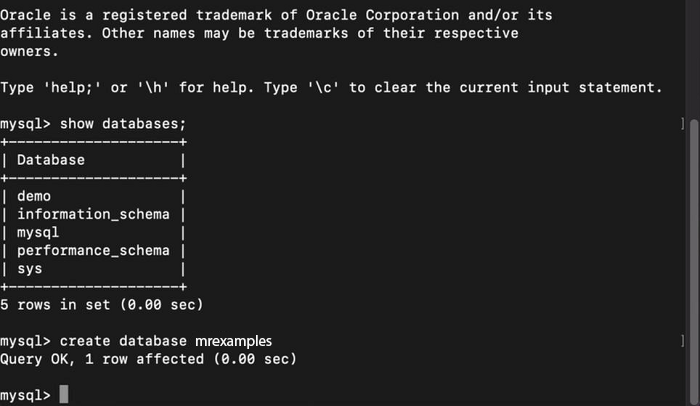
Step 4: You will find your newly created database is added to MySQL when you run the following command again.
show databases;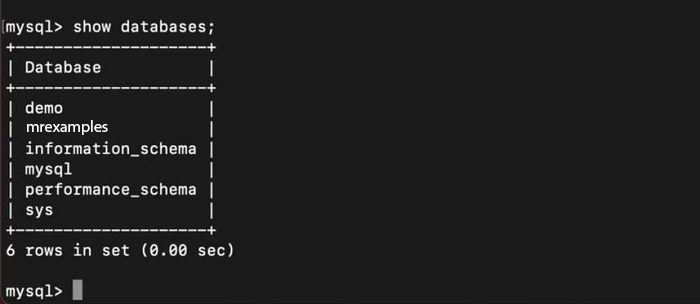
As a result of this tutorial, you now know how to install MySQL on Mac OS and set up a database using the Mac Terminal application.
