Updating Your Existing App to a Beeware Android Application
Discover the amazing features and functionalities of Beeware Android Application in this comprehensive article.
If you already have an existing Python app and you’re interested in bringing it to the Android platform, Beeware provides a unique and powerful solution. Beeware allows you to leverage your existing Python codebase and create a native Android application with minimal effort.
The deployment process for Android is quite similar to that of desktop applications. With Briefcase, you can install Android dependencies, including the Android SDK, emulator, and Java compiler.
Create And Compile an Android App
To get started, you need to install Beeware on your local machine. To setup Beeware on your PC, you can easily do so by following the step-by-step guide we have published in our Beeware Android Application article.
To begin, you should execute the create command, which will download an Android app template and integrate your Python code into it.
Beeware Android Application – MacOS
(beeware-venv) $ briefcase create android

[helloworld] Generating application template...
Using app template: https://github.com/beeware/briefcase-android-gradle-template.git, branch v0.3.12
...
[helloworld] Installing support package...
No support package required.

[helloworld] Installing application code...
...
[helloworld] Installing requirements...
writing requirements file... done

[helloworld] Installing application resources...
...

[helloworld] Removing unneeded app content...
No app content cleanup required.

[helloworld] Created build/helloworld/android/gradle
Beeware Android Application – Linux
(beeware-venv) $ briefcase create android

[helloworld] Generating application template...
Using app template: https://github.com/beeware/briefcase-android-gradle-template.git, branch v0.3.12
...
[helloworld] Installing support package...
No support package required.

[helloworld] Installing application code...
...
[helloworld] Installing requirements...
writing requirements file... done

[helloworld] Installing application resources...
...

[helloworld] Removing unneeded app content...
No app content cleanup required.

[helloworld] Created build/helloworld/android/gradle
Beeware Android Application – Windows
(beeware-mrxenv) C:\...>briefcase create android

[helloworld] Generating application template...
Using app template: https://github.com/beeware/briefcase-android-gradle-template.git, branch v0.3.12
...
[helloworld] Installing support package...
No support package required.

[helloworld] Installing application code...
...
[helloworld] Installing requirements...
writing requirements file... done

[helloworld] Installing application resources...
...

[helloworld] Removing unneeded app content...
No app content cleanup required.

[helloworld] Created build\helloworld\android\gradle
When you run the command briefcase create android for the first time, Briefcase will download a Java JDK and the Android SDK.
This process can take a considerable amount of time due to the large file sizes, and it may take up to 10 minutes or longer, depending on the speed of your internet connection. After the download completes, you will be prompted to accept Google’s Android SDK license agreement.
Once the download and setup process completes, you will find a directory named build\helloworld\android\gradle in your project, containing an Android project with a Gradle build configuration.
This project will include your application code and a support package containing the Python interpreter.
At this point, you can use Briefcase’s build command to compile your project into an Android APK app file.
Beeware Android Application – MacOS
(beeware-venv) $ briefcase build android

[helloworld] Building Android APK...
Starting a Gradle Daemon
...
BUILD SUCCESSFUL in 1m 1s
28 actionable tasks: 17 executed, 11 up-to-date
Building... done

[helloworld] Built build/helloworld/android/gradle/app/build/outputs/apk/debug/app-debug.apk
Beeware Android Application – Linux
(beeware-venv) $ briefcase build android

[helloworld] Building Android APK...
Starting a Gradle Daemon
...
BUILD SUCCESSFUL in 1m 1s
28 actionable tasks: 17 executed, 11 up-to-date
Building... done

[helloworld] Built build/helloworld/android/gradle/app/build/outputs/apk/debug/app-debug.apk
Windows
(beeware-mrxenv) C:\...>briefcase build android

[helloworld] Building Android APK...
Starting a Gradle Daemon
...
BUILD SUCCESSFUL in 1m 1s
28 actionable tasks: 17 executed, 11 up-to-date
Building... done

[helloworld] Built build\helloworld\android\gradle\app\build\outputs\apk\debug\app-debug.apk
The length of this process will depend on the speed of your Internet connection and could take about 10 minutes or more.
Run Your App
Now that you have completed the necessary steps for Beeware Android Application, you are ready to run your application. To do this, use the run command provided by Briefcase and choose to run the app on an Android device.
If you prefer to start with an Android emulator, that is also an option. Simply enter the command “briefcase run android” and you will be presented with a list of devices to choose from.
In case you don’t have any emulator, you can select the option to create a new one.
MacOS
(beeware-venv) $ briefcase run android

Select device:

1) Create a new Android emulator

>
Linux
(beeware-venv) $ briefcase run android

Select device:

1) Create a new Android emulator

>
Windows
(beeware-mrxenv) C:\...>briefcase build android

Select device:

1) Create a new Android emulator
Now, you can choose the device that you want to use. Simply select the option “Create a new Android emulator” and proceed with the default device name (beePhone).
When you use the “Briefcase run” command, the virtual device will be automatically launched.
You will know it’s booting when you see the Android logo on your screen:

When your device has finished starting up, Briefcase will add your application to it.
This will take a short while, during which you might see a screen with app icons on it:
Once the installation is complete, the app will launch. You will notice a splash screen that appears briefly while the app is loading:

In case you have an older machine or some features are disabled, you might face some issues. For help with troubleshooting, check out the Requirements and recommendations section of the Android developer documentation.
When you open the app for the very first time, it will need to unpack itself on the device.
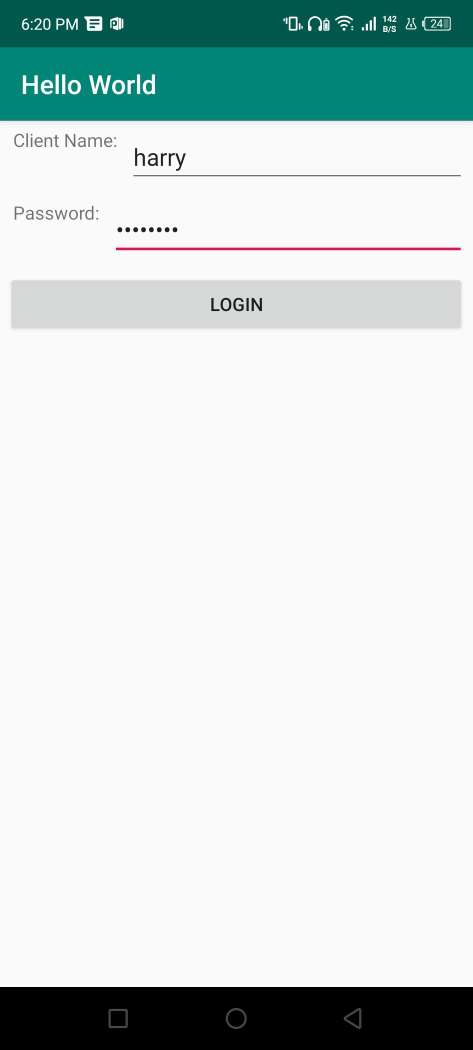
This might take a little bit of time. But once it is done unpacking, you will see the Android version of our desktop app:
If your app doesn’t appear to launch, you might need to look for any error messages in the terminal where you ran briefcase run.
In the future, if you want to run the app on this device again without using the menu, you can tell Briefcase to do so by providing the emulator’s name directly.
You can use “briefcase run android -d @beePhone” to run the app on the virtual device directly.
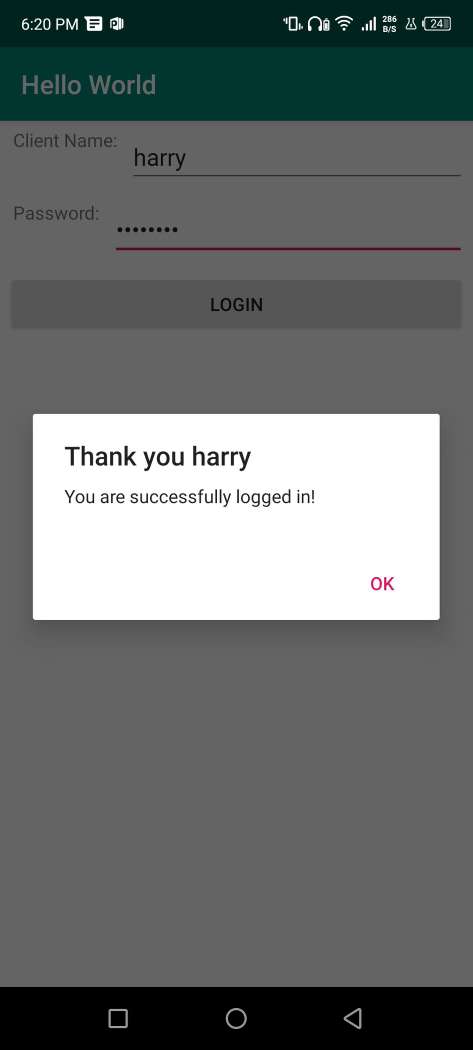
After clicking on the login button you will see the following output:
Run Your App On Physical Device
If you have an Android phone or tablet, you can connect it to your computer using a USB cable and use a Briefcase to work with it.
To use your device for development purposes for Beeware Android Application, you need to prepare it by making some changes to its settings.
There are two options that you need to change:
- Enable developer options
- Enable USB debugging
You can find instructions on how to make these modifications in the Android developer documentation.
After you finish these procedures, your device will be visible in the list of accessible devices when you execute “briefcase run android”.
MacOS
(beeware-venv) $ briefcase run android

Select device:

1) Pixel 3a (94ZZY0LNE8)
2) @beePhone (emulator)
3) Create a new Android emulator

>
Linux
(beeware-venv) $ briefcase run android

Select device:

1) Pixel 3a (94ZZY0LNE8)
2) @beePhone (emulator)
3) Create a new Android emulator

>
Windows
(beeware-mrxenv) C:\...>briefcase run android

Select device:

1) Pixel 3a (94ZZY0LNE8)
2) @beePhone (emulator)
3) Create a new Android emulator

>
You can observe a new physical device, a Pixel 3a, on the deployment list with its serial number. If you ever want to run your application on this device directly, without navigating through the menu, you can provide the device’s serial number to Briefcase (for example, “briefcase run android -d 94ZZY0LNE8”). This way, your application will run on the device automatically, without any prompts
Benefits
- With Beeware, developers can use a single codebase to create applications for multiple platforms, including Android, iOS, Windows, macOS, and Linux. This can reduce development time and costs.
- Beeware allows developers to use Python, which is a popular, easy-to-learn programming language used in many areas, including data science and machine learning. This makes it easier for developers to create complex applications.
- Beeware provides access to popular Python libraries and tools, such as Django and Flask, which can help developers create sophisticated and high-performing applications.
- Beeware applications are compiled natively, meaning they can achieve the same level of performance as applications written in Java or Kotlin.
- Beeware is an open-source project with a vibrant community of developers contributing to its development. This means that developers can rely on a wealth of support, documentation, and resources to help them get started with Beeware.
- Beeware provides a range of tools and libraries that can help developers streamline the development process, making it easier to create applications that meet their specific requirements.
- Beeware allows developers to create applications with native user interfaces, which can help to improve the user experience and increase user engagement with the application.
Conclusion
If you’re a developer looking to create cross-platform applications, Beeware Android Application can offer a variety of benefits. It leverages the widely-used Python programming language and provides access to common libraries and tools, all while supporting native performance.
Additionally, the open-source community provides ample resources and support to help you get started. By using Beeware, you can simplify your development process, create applications with excellent performance, and deliver a superior user experience on multiple platforms.
