Flask File Uploading: A Comprehensive Guide
If you’re developing a web application with Flask, there may come a time when you need to implement Flask file uploading functionality.
Flask makes it easy to handle file uploads with its built-in features. In this guide, we will cover everything you need to know about Flask file uploading, from the basics to more advanced concepts.
Understanding Flask File Uploading
File uploading is a common requirement for many web applications, and Flask makes it easy to handle with its request object. When a user uploads a file, it is sent as part of an HTTP POST request. Flask provides a simple way to access the uploaded file via the request object. You can then save the file to a directory on your server or process the data in some other way.
Getting Started with Flask File Uploading
To get started with Flask file uploading, you first need to create an HTML form that allows users to select a file to upload and assign the enctype attribute to ‘multipart/form-data‘ to post the file to a URL. Then, the URL handler retrieves the file from the request.files[] object and saves it to the location of your choice.
The uploaded file is temporarily stored on the server before being saved to its final location. You can either set the name of the destination file manually or get it from the filename property of the request.files[file] object. However, it is recommended to use the secure_filename() function to get a secure version of the filename.
You can also specify the default upload folder path and maximum size of the uploaded file in the configuration settings of the Flask object.
| app.config[‘UPLOAD_FOLDER’] | Indicates path for upload folder |
| app.config[‘MAX_CONTENT_PATH’] | This indicates the maximum file size that can be uploaded, measured in bytes. |
In the code provided, there is a URL rule for ‘/’ that shows the ‘form.html’ file located in the templates folder. Additionally, there is a URL rule for ‘/uploaded’ that calls the uploaded() function to handle the file upload process.
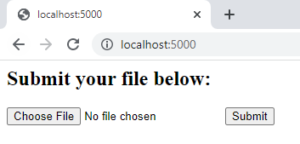
The ‘form.html’ file includes a button for choosing files and a button for submitting the upload request.
<html>
<body>
<h2>Submit your file below:</h2>
<form action = "http://localhost:5000/uploaded" method = "POST"
enctype = "multipart/form-data">
<input type = "file" name = "file" />
<input type = "submit" />
</form>
</body>
</html>
form.html provides the following output:
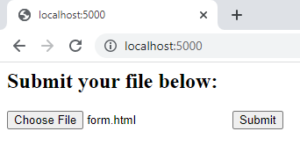
Once you have selected a file, click on the Submit button. This will trigger the form’s post method and call the URL ‘/uploaded’. The ‘uploaded()’ function, which is running in the background, will then proceed to save the file.
Here is the Python code for your Flask application:
from flask import Flask, render_template, request
from werkzeug.utils import secure_filename
app = Flask(__name__)
@app.route('/')
def upload_file():
return render_template('form.html')
@app.route('/uploaded', methods = ['GET', 'POST'])
def uploaded():
if request.method == 'POST':
mrx = request.files['file']
mrx.save(secure_filename(mrx.filename))
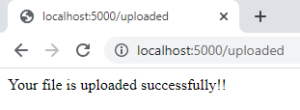
return 'Your file is uploaded successfully!!'
if __name__ == '__main__':
app.run(debug = True)
Program Output
After clicking on the submit button you will see the following output:
Example Explanation
In this example, we are creating a Flask application that allows users to upload a file through a form. When the user navigates to the root URL (‘/‘), the ‘upload_file()‘ function is called, which renders an HTML template containing the form.
Once the user selects a file and clicks the Submit button, the ‘uploaded()’ function is triggered by the form’s post method, which is set to call the ‘/uploaded’ URL. In this function, we first check if the request method is ‘POST’, which means the user has submitted the form. Then, we get the file from the request object and save it to the server using the ‘secure_filename()’ method, which ensures that the filename is secure and cannot be used to execute arbitrary code. Finally, we return a message to the user indicating that the file has been uploaded successfully.
If we run this Flask application, it will be available on our local machine at http://localhost:5000/. We have set the debug mode to True, which means that any errors will be displayed in the browser, making it easier to debug the application.
Handling Large Files
Flask is great for handling small file uploads, but if you need to handle large files, you may run into some issues. By default, Flask stores uploaded files in memory, which can lead to memory issues if the file is too large. To handle large file uploads, you can use Flask-Uploads, a third-party Flask extension that provides additional functionality for handling file uploads.
Flask-Uploads provides several features for handling large file uploads, including support for streaming large files, chunked uploads, and resumable uploads. It also provides a convenient way to generate unique filenames for uploaded files to avoid naming conflicts.
Securing File Uploads
One of the biggest security concerns with file uploading is the risk of malicious files being uploaded to your server. To mitigate this risk, it’s important to validate the uploaded file to ensure it is a valid file type and does not contain any malicious code. You can use Flask-WTF, a Flask extension that provides form handling and validation functionality, to validate uploaded files.
Flask-WTF provides a FileField class that you can use in your Flask forms to handle file uploads. The FileField class automatically handles file validation, including checking file type and size, and can also be configured to restrict file types and sizes.
Flask File Upload Benefits
- You can simplify the process of accepting and processing user-uploaded files by using Flask’s easy-to-use interface for file uploading.
- By allowing users to upload files directly through your website, you can create a more seamless and streamlined user experience, which can lead to improved user engagement and satisfaction.
- Flask provides built-in security features that help protect against data corruption or tampering, such as the ‘secure_filename()’ method, which ensures that uploaded files cannot be used to execute arbitrary code on the server.
- With Flask, you can easily customize the file upload process to meet your specific needs. For example, you can configure the size and type of files that can be uploaded or specify where uploaded files should be stored on the server.
- Flask makes it easier to manage user-uploaded files, including renaming, deleting, or moving files to different locations on the server. This can help improve data organization and reduce the risk of data loss.
Conclusion
As a web developer, you can benefit from Flask File Uploading, which provides you with a simple interface for handling user-uploaded files. This makes the file upload process easier and improves the overall user experience. With built-in security features and customizable options, Flask allows you to ensure data integrity while providing the flexibility to meet your specific requirements. Furthermore, Flask makes it easier for you to manage user-uploaded files, which helps with data organization and reduces the risk of data loss. Overall, Flask File Uploading is a valuable tool that you can use to create a secure and seamless file upload experience for your users.
