Understanding Tailwind Border Collapse
In this article, we will explore Tailwind Border Collapse class and how it can be used to create tables in Tailwind.
In Tailwind CSS, the border-collapse class can be used to determine whether the cells inside a table share a common border.
This class, along with the border-separate class, can be used to set the borders of those cells.
Tailwind Border Collapse Class
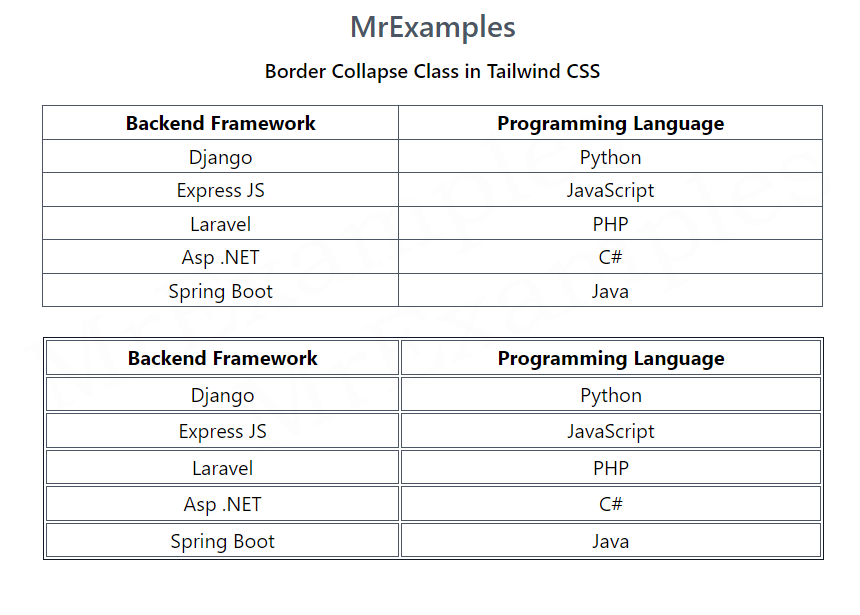
Tailwind border collapse class in Tailwind CSS is used to combine adjacent cell borders into one.
This means that the borders between adjacent cells will not be visible, and the table will have a single border around it.
Syntax
<element class="border-collapse"></element>
To use the border-collapse class in Tailwind, you can simply add the class to the table element.
Let’s explore the border-collapse class in Tailwind through an example:
<!DOCTYPE html>
<html>
<head>
<script src="https://cdn.tailwindcss.com"></script>
</head>
<body class="text-center mx-4 space-y-2">
<h1 class="text-gray-600 text-2xl font-semibold">
MrExamples
</h1>
<p class="font-semibold my-2">Border Collapse Class in Tailwind CSS</p>
<div class="grid grid-flow-col text-center p-2">
<table class="border-collapse border border-gray-900">
<thead>
<tr>
<th class="border border-gray-600">Backend Framework</th>
<th class="border border-gray-600">Programming Language</th>
</tr>
</thead>
<tbody>
<tr>
<td class="border border-gray-600">Django</td>
<td class="border border-gray-600">Python</td>
</tr>
<tr>
<td class="border border-gray-600">Express JS</td>
<td class="border border-gray-600">JavaScript</td>
</tr>
<tr>
<td class="border border-gray-600">Laravel</td>
<td class="border border-gray-600">PHP</td>
</tr>
<tr>
<td class="border border-gray-600">Asp .NET</td>
<td class="border border-gray-600">C#</td>
</tr>
<tr>
<td class="border border-gray-600">Spring Boot</td>
<td class="border border-gray-600">Java</td>
</tr>
</tbody>
</table>
</div>
</body>
</html>
Tailwind Border Separate Class
Tailwind’s border-separate class forces each cell’s border to be displayed separately.
This means that the borders between adjacent cells will be visible, and the table will have multiple borders around it.
Syntax
<element class="border-separate"></element>
To use the border-separate class in Tailwind, you can simply add the class to the table element.
Here is a brief example of a border-separate class in action:
<!DOCTYPE html>
<html>
<head>
<script src="https://cdn.tailwindcss.com"></script>
</head>
<body class="text-center mx-4 space-y-2">
<h1 class="text-gray-600 text-2xl font-semibold">
MrExamples
</h1>
<p class="font-semibold my-2">Border Separate Class in Tailwind CSS</p>
<div class="grid grid-flow-col text-center p-2">
<table class="border-separate border border-gray-900">
<thead>
<tr>
<th class="border border-gray-600">Backend Framework</th>
<th class="border border-gray-600">Programming Language</th>
</tr>
</thead>
<tbody>
<tr>
<td class="border border-gray-600">Django</td>
<td class="border border-gray-600">Python</td>
</tr>
<tr>
<td class="border border-gray-600">Express JS</td>
<td class="border border-gray-600">JavaScript</td>
</tr>
<tr>
<td class="border border-gray-600">Laravel</td>
<td class="border border-gray-600">PHP</td>
</tr>
<tr>
<td class="border border-gray-600">Asp .NET</td>
<td class="border border-gray-600">C#</td>
</tr>
<tr>
<td class="border border-gray-600">Spring Boot</td>
<td class="border border-gray-600">Java</td>
</tr>
</tbody>
</table>
</div>
</body>
</html>
Conclusion
The border-collapse and border-separate classes in Tailwind CSS are useful for creating tables with shared or separate cell borders.
By understanding these classes, you can create tables that are visually appealing and easy to read.
Try using these classes in your next Tailwind project to see how they can help you create beautiful tables.
